Soundproofing Tiles products and materials for Hospitals

echo eliminator by acoustical soundproofing product suppliers and acoustical soundproofing consultants

Hospital Soundproofing ceiling tiles

Hospital soundproofing with quality soundproofing materials assumes significance, because of the common patient complaints about the high levels of noises prevailing there. The sources are many, the patient monitoring systems, mobile phones, wheelchairs, elevators and squeaking wheel carts are a few to mention. The noisy atmosphere in a hospital affects the inmates by depriving their sleep, increasing blood pressures and by interfering with pain management and wound healing. The hospital staffs, mainly the doctors and nurses who are constantly exposed to high decibel levels get stressed. The average noise levels in hospitals are much above the desirable levels of 35 decibels. To reduce noise levels and ensure good soundproofing in hospitals with quality soundproofing materials have started implementing several acoustical control measures.

Selection of Soundproof Ceiling Tiles

Speech privacy is a factor influencing hospital soundproofing. Suitable ceiling tiles as soundproofing materials must be selected depending upon the room type. The tiles appropriate for lobbies and nurses’ area may be different from ICU’s or private rooms or wards. The communication between the doctor, patient, and nursing staff must be clear and intelligible. A proper acoustical ceiling tile can help to achieve this. Before selecting tiles decide to what extent you want to block, absorb, or mask noises. A suspended acoustical ceiling system is good for hospital soundproofing for absorbing noise and creating an acceptable acoustic environment with quality soundproofing materials.

Acoustical Ceiling Tiles as soundproofing materials Recommended

Glass fiber acoustical ceiling tiles are suitable for sound absorption. To make them acceptable for hospital soundproofing where cleanroom applications are involved, the soundproofing materials like acoustic panels are covered with anti-microbial film. They are also particle-free. Glass fiber acoustical ceiling tiles are very suitable for hospital spaces like open offices and corridors because their sound isolation qualities are low and hence they are most appropriate for corridors and open offices where background noises often mask other noises.
Mineral fiber acoustic ceiling tiles lower absorption properties and they are good for reducing sound transmission. These acoustical ceiling tiles are suitable for hospital soundproofing where both sound isolation and absorption are required.
Neonatal intensive care units need special attention in a hospital soundproofing program. A combination of mineral fiber and glass fiber is a good option for neonatal care units. Sound product or soundproofing material Gypsum board also can be used as a backing.
Cast mineral fiber composition is found to enhance sound absorption and sound isolation.
For hospital soundproofing of walls select surface-mounted wall panels one inch thick, or other sound-absorbing materials that will absorb noise in large areas where there are chances of noise build-up.
For floors, the soundproofing material selected must reduce impact noise originating from footfalls and from other sources like rolling carts.
Avoid gaps between tiles laid on floors to eliminate vibrations due to rolling trolleys. Carpet tiles are better than normal carpets which retain dust and are also difficult to clean.

Some More Soundproofing Tips

For improving hospital soundproofing select ceiling materials that have high sound absorptive properties for areas like outpatient departments and wards. Wherever possible, provide walled partition instead of curtains for better patient comfort and privacy.
Hospital Soundproofing Tiles supplied by Interior game. Ceiling Tiles absorb sound from the room or hall and it stops echo sound in the hospitals where ceiling height is higher. Soundproofing materials are imported from the USA and built new innovative acoustic products built for Indian conditions. For your requirements of soundproofing materials and products call us or visit us www.interiorgame.info or send an email to pgopalakrishnan2002@gmail.com.

Our Acoustical Soundproofing products and services

Acoustics, hospital soundproofing, soundproofing materials, fiber cement board, fiber cement board, raised access floor, Acoustic wall panelling, Acoustic walls, Soundproofing, Noise control, Echo Elimination, Noise Isolation, Sound Isolation, Home Theatre Construction, Home theatre, Studio construction, Recording studio, Reverberation control, Echo Control, Home Cinema, Noise and Vibration, Music studio construction, Fabric wall panels, Absorbent panels, Noise Free Ceilings, Soundproof Doors, Noise Control in Homes, Noise control in theater, Sound leakage control, Indoor Sound Block, Sound Absorbing Materials supplier.

Wall panels, Reduce Sound level, Block the sounds getting out, Sound Controlling door, Sound Control Material, Sound Proof panels, Noise-free homes, Recording studio Sound Control, Echo Controller, Echo minimizer, Echo reducer, How to control echo, Noise-free glasses, Noiseless Auditorium, How to control sound by wood, How can I record without noise, Noise proof window panels, Soundproofing suppliers in Bangalore, Soundproof at home, Sound control at gym, Best company for soundproof, Top companies in noise control, Top companies in acoustics, Top companies in noise control, Soundproof screens, Home theater essentials.

Pleasant homes, Don’t allow the sound to go out, Block the sound, Soundproofing solutions, Soundproofing top companies list, List of companies in acoustics at Bangalore, Noise control in school, Soundproof wall treatment, Low cost soundproof materials, Best acoustics companies in India, Noise control solutions, Vibration control, What should I do for control noise, How to build a noiseless home, How to maintain sound to not go out, Suggest some sound leakage blocking panels, Isolate the sounds, Transmission control of sound, Loudness controller.

Noise barriers in India, Sound pressure level controller, Control sound by interiors, Control traffic noise, Soundproof insulation, Noise control sources, Soundproofing Products, Sonex, Ceiling, Wall Panels, Sound Control Curtains, Equipment Enclosures, Acoustical Baffles and Banners, Solid Wood, Veneer Acoustical Ceiling, Wall Systems, Professional Audio Acoustics, Vibration & Damping Control Fire Retardant Acoustics, Hearing Protection, Moisture and Impact Resistant Products, Floor Impact Noise, Noise Reduction, Sound Absorbers, Noise Barriers, Fabric Wrapped Wall Panels, Acoustical Foam, Egg Crate, Acoustical Sealants and Adhesives, Outdoor Noise Control, Assistive Listening Devices, OSHA, FDA, ADA Compliance, Acoustical Design and Consulting.

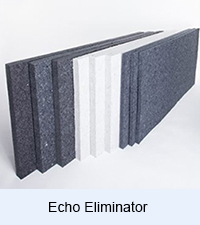
ECHO ELIMINATOR, SOUND SILENCER, DBA PANELS, POLY MAX ACOUSTICAL PANELS, DECORATIVE FABRIC PANELS, HANGING ACOUSTICAL BAFFLES, SOUND ABSORBING FOAM, SONEX FOAM PRODUCTS, NOISE BARRIER-NOISE BLOCKERS, SCHOOL NOISE MANAGEMENT, FLOORING UNDERLAYS, SEALANTS–ADHESIVES–GREEN, ACOUSTICAL CEILING TILES, SOFTWALL – WALLMATE, VIBRATION MOUNTS–HANGERS, HVAC PRODUCTS – SILENCERS, ACOUSTIC – SOUNDPROOF DOORS.

ACOUSTIC ENCLOSURES, WALL INSULATION, ELECTRONIC SOUND LEVEL METER, SOUND TEST-ACOUSTICAL ANALYSIS, ADJUSTABLE DOOR SEALS, DESIGNER ACOUSTICAL CURTAINS, ACOUSTIC WINDOWS – INSERTS, RSIC SOUND ISOLATION CLIPS, ACOUSTI-BOARD, OUTDOOR BARRIER WALL SYSTEM, ONE STEP DECORATIVE SYSTEM, ACOUSTIMETAL PANELS, SOUND SCREEN NOISE MACHINE, ACOUSTI-GASKET TAPE, T-MOLD SYSTEM, ACOUSTICAL FABRIC SELECTION, ADJUSTABLE SPRINKLER CUTTER, WOOD WOOL PANELS, TECHNO ACOUSTIC WALL PANEL,


Latest soundproofing Products and materials For various applications

Acoustic soundproofing products in Bangalore, Chennai, Hyderabad, Cochin

Latest Acoustical soundproofing Products

We use unique acoustic soundproofing products for various applications. Different places which include classrooms, recording studios, indoor live performance halls and churches percentage one aspect in not unusual and this pertains to soundproofing. For the ones of you who can be unaware about this, the locations noted calls for spoken phrases and sounds to be transmitted in a completely crisp and clear manner if viable. And in order for this to be achieved, soundproofing substances need to be set up.

Classroom soundproofing

In school rooms today that accommodate many students, a trainer’s lecture wishes to be heard loud and clear in order that even those at the lower back component can still understand the training being mentioned. that is wherein the essence of acoustics comes in.

Acoustic materials assist in noise manipulate and discount as well as echo and vibrations in any interior area. that is to attain a clean sound that may be heard and understood by folks that are listening and to save you noise from coming into the room.

Acoustic soundproofing products in Bangalore, Chennai, Hyderabad, Cochin

Acoustic Soundproofing foam

This is good for sound control and air seal in each residential and commercial spaces and is established in walls and ceilings. It specially blocks sounds coming from the outside thereby making the indoors area a quiet vicinity for families and people. while used in homes, this could even save you the smell of cooking and smoking from penetrating the wall cavities.made from polyurethane or polystyrene or melamine, numerous manufacturers of those soundproofing foam panels are available inside the marketplace these days. you may discover patterns just like egg cartons and other textured surfaces.

Acoustic quilt soundproofing product

This is an ECO pleasant product that makes use of glass mineral wool from silica sand, a naturally occurring mineral. It uses acoustic fiberglass absorption and acoustic membrane laminated within the center to block sounds from flooring, partitions and ceilings. taken into consideration superior in comparison the standard hollow space infill together with lead and the ordinary mineral wool.

Acoustic mineral wool soundproofing

Acoustic soundproofing  mineral wool may serve as a valid soaking up infill to save you the access of airborne noise in among partitions, floors joists and suspended ceilings. Being a thicker material in comparison to the same old loft insulation, this is higher in absorbing sound and extraordinary for soundproofing ceilings.
Soundproofing mats – Prevents the transmission of airborne noise and works higher than lead. made from mass loaded vinyl Barrier or MLVB, this thin mat that incorporates mineral is right to be used in lightweight floors and partitions appreciably for domestic projects. for max efficiency, you may use to a few layers of those mats on timber floors.

Our Acoustical soundproofing products and services

Home theater acousticals, home theater soundproofing, acoustical soundproofing products, Noise stop vinyl barrier, soundproof windows cost in India, matt emulsion, soundproof studio foam, bedroom interior design in Hyderabad, glass door fittings in Hyderabad,

Decorative foam ceiling tiles, window blinds Mumbai, acoustic tiles for walls, interior designers, blinds, plumber, interior designers in Hosur, home interior design in Tamil Nadu, interior design, interior, interior decoration, wooden curtains, blinds for windows, how to setup a recording studio in your home, home design, home interior products, house design, adjustable bed, soundproof ceiling factory,

Acousti-gasket tape, interior ceilings, false ceiling contractors Bangalore, false ceiling contractors in Bangalore, false ceiling dealers in Chennai, false ceiling contractors in Chennai, mass loaded vinyl alternative, acoustic board, poly max acoustic panels, theme based interiors, SEPS insulated decorative wall panel factory, sound absorption material suppliers, soundproofing a gymnasium, sound absorbing materials suppliers, cheap baffle ceiling, noiseless acoustics, echo eliminator, soundproof curtains India.


Re-cycling fabrics with efficient patchwork – Interior designing and decoration tips and guidance

PATCHWORK COVERLET

Patchwork was originally developed as a method of re-cycling fabrics, but has developed into an art form. This basic machine method based on simple shapes like the square and triangle is a time- saving way to re-create the effect. Quilting can be done after all the patches are sewn together. Cut out all the shapes with the same seam allowance so that they match up at the seam lines when the units, or blocks, of smaller patchworks are sewn together into the final throw over. The instructions here are for the simplest throw over made from squares that are all the same size (or you can assemble triangles to the same size as the squares shapes like the square and triangle is a time- saving way to re-create the effect.

Quilting can be done after all the patches are sewn together. Cut out all the shapes with the same seam allowance so that they match up at the seam lines when the units, or blocks, of smaller patchworks are sewn together into the final throw over. The instructions here are for the simplest throw over made from squares that are all the same size (or you can assemble triangles to the same size as the squares).

MAKING QUILTS For variations of pattern, plan the arrangement of squares on graph paper before you start, using crayons or colored pens to organize the color sequences. You can increase the number of fabrics you use so that the whole is graded in tone from the center outwards, Choose three or four coordinating fabrics and cut them first into strips, 12 cm (4i in) wide, and then into squares of the same measurement. 

Press under 1 cm (i in) wide turnings all around each square. Take the first two squares, in two different fabrics, and join with a flat seam. Join further squares to the opposite free edges, keeping the different patterns in the same order. Join enough squares to make a strip the length of the finished guilt, Make up further strips until you have enough to fit the width of the guilt. Plan the strips so that each one starts with a different fabric in the sequence. Press all seams open and clip across corners of seam allowance, Join the strips in the same way as the squares, being careful to take precise 1cm seam allowances. 

Check the arrangement of the strips before stitching so that they form diagonal bands of pattern. Press the seams open. Make up the guilt with a plain backing panel and a piece of wadding the same size as the patchwork panel, and bind the edge. When joining triangles to form’ a square, match the raw edges carefully or the resulting seam will be incorrectly aligned. 

Hand sewing curtains in interior designing and decoration for windows and doors

HAND SEWING CURTAINS
Use dressmaker’s chalk to mark the pleat fold lines on the back of the ungathered curtain, according to the calculations. Fold and- stitch along the pleat lines in a straight line to 10 cm (4 in) depth, then 4 fold each pleat by hand. Stitch the base of the pleat by hand, and catch the inner folds together at the top. Insert spiked hooks- into each pleat.
 WINDOW DRESSING SWAGS & TAILS
Swags and tails are fixed to a shelf above the window. There are no text-book rules for proportions, but as with all window dressing, if you want plenty of light to come through the window, fit the shelf well above the window and extend it on either side. Norm- ally, the first pleat of the tail should be at about the same level as the lowest point of the sweep of the swag. When making your own swags and tails, it is worth using old sheets to make a mock-up or toile of the finished item. The upper edge should be about 50 cm (20 in) shorter than the shelf, and the lower edge about 20 cm (8 in) longer, according to the depth of the swag.
 Decide on an appropriate depth for the tails, depending on the fullness required. Pin the toile across the top of the shelf to give the effect, pleating or gathering the ends. When you are happy with the arrangement, mark the fabric where it folds over the front edge.
Open out the taile and mark the seam line following the existing marks. Use this as a guide to cut out the fabric, allowing 4 cm turnings along the top and bottom edge, and 10 cm (4 in) for gathering and finishing down the angled side edges. Make up the swag, lining and interlining if necessary, as for machine- or hand-made curtains, treating the upper and lower edges of the swag as the sides of the curtain. Gather or pleat the angled sides along the seam line and pin in place to check the drape. Topstitch, then trim the raw edges and finish by binding or zigzag stitching.
To make a toile for the tails, plan the width and spacing for the fold lines using a tape measure held along the top of the shelf. Decide on the inner and outer lengths of the tails and transfer all the measurements to the toile fabric. Cut out and check for fit. 4 Use the toile as a pattern piece, allowing 2 cm G in) turnings all around the sides and lower edge, and 10 cm (4 in) at the top edge. Cut lining to the same size as the main fabric. Interline the main fabric panel, then position the lining on the tail, right sides facing, and stitch together all around the sides and lower edges. Trim scams, press and turn right side out.

Press again, then mark and press the pleats into position. Check for fit, then top- stitch pleats, trim raw edges and bind or zigzag stitch together. 5 Finally, fit the swags and tails in place, stapling them to the top of the shelf so that the tails overlap the ends of the swag.

Making Cushions for Your home – Interior designing and decoration tips- Guide

CUSHION

Cut out a fabric panel for the top of the cushion, making a template if necessary. Include a 12 mm scam allowance. For the back, cut two panels of fabric to fit the cushion allowing 2.5cm extra for the zip to be inserted across the panel. Make up a welt to fit tightly around the cushion pad. Clip into the scam allowances at the corners. 

If the cushion is round or awkwardly shaped, cut the welt on the bias to make it easier to fit. Fit piping all around the upper and lower panels if required. With right sides facing inwards, fit the top and base panel to the welt and pin. If the cushion is to be tied in place, make up fabric tics and pin them into the scams at the back corners. Remove the pinned cover by opening the zip and machine stitch the scams.

Clip scam allowance across the corners and notch curved scams as necessary (  198). The zip can be inserted into the welt in which case measure up for two lengths of fabric to make up the welt, one that extends around adjoining corners by 5cm both ways. This piece needs to be 2.5 cm wider than the other welt piece so that it can be split down its length to insert the zip. With the zip open, right sides facing and raw edges matching, sew around the cushion. Turn right side out. Press before inserting the cushion pad.

MAKING CUSHIONS BOLSTER CUSHION

Before cutting the fabric, decide whether any pattern should run along or around the cushion. Cut a rectangle of fabric long enough to wrap around the bolster pad, with 12 mm seam allowance down all sides. Make the rectangle into a tube to fit around the pad, setting a zip into the seam. Fit on to the pad wrong side out, and clip into the seam allowance. Cut a circle of fabric for each end of the cushion, including the same seam allowance.

Apply piping or frills around the edge if required. Fit the circles on to either end of the tube, wrong side out, and tack along the seam line. Remove the cover from the pad and machine stitch scams. Layer and notch seam allowances and press towards the circles. Press, and then turn right side out and press again before inserting the cushion pad. You can decorate the end of bolsters with tassels, rosettes, covered buttons etc. 

Interior designing and decoration window dressing tips

SWAGS & TAILS WINDOW DRESSING LACE & VOILE
The prettiest and most romantic of fabrics, lace gently filters light into a room whilst ensuring privacy. Usually light in color, lace has distinctive qualities of texture and drape, spangling sunlight, creating shadows and fluttering in the breeze from an open window. Muslin and voile, either plain or sprigged with flowers and garlands, can be turned into wispy swags or brief draperies to head a classic window, or they can be reefed up into festoons.
But these fine fabrics drape gloriously when generous lengths are looped and swathed around curtain poles and allowed to descend in full-length cascades, or a full curtain can be knotted halfway- down to flare out again at the hemline. Sheer curtains can overlap across the full width of a window and then be tied back in graceful loops, one side set higher than the other and the overlapping edges accentuated with tassel trimming.
Figured lace should be used much more sparingly than muslin or voile. Lace curtains need very little fullness; in fact some panels look most effective when hung flat against the window using a cased heading or curtain rings and a slender pole. Lace panels with integral borders running round three sides sometimes have a lightweight drawstring tape across the top, stitched so that it doubles as a cased heading. Pelmet (valance) lace is also available and can add a further layer to a lace window treatment. 
When voile or lace curtains are needed for privacy, sew cased headings and slot the fabric in un-join widths (to avoid ugly seams) on to rods at both top and bottom, anchored within the window frame so that they hold the fabric lightly taut across the face of the glass. This method particularly suits French windows and glazed doors and is essential to hold fabric close to pivot and sloping windows.
 The casings top and bottom are made with two lines of stitching, forming a (stand’ or heading. Simple ties draw the curtains in at the waist. A plain roller blind screens the top part of the window, and can be drawn down necessary. RIGHT A pair of lace panels has been fitted over a slim brass rod to hold these curtains close to the frame oj these generous bedroom windows. The width of each curtain allows for gentle gathers hut still shows off the pattern of the lace.
WINDOW DRESSING MAKING LACE & VOILE CURTAINS
 To show off intricate patterns on panels of lace, whether antique or contemporary, you need very little fullness. Use either a cased heading or clip-on rings to achieve this effect. Take particular care when measuring for lace panels: if they are hung by rings from a pole, measure from just beneath the pole; if they are hung from a plain track or rod, measure from the top of the fixture. Headings for any type of sheer curtain fabric may be made in a number of ways, depending on the nature of the fabric and the effect you want.

 A cased heading, which enables you to slot the fabric onto a curtain rod or wire, is the simplest to make. For more formal gathers there are special lightweight curtain heading tapes. Because of the transparent nature of the fabric, seams must be made as invisible as possible with borders arranged carefully around the edge of the curtains. Allow ample fullness with fine voile and other fabrics – up to three times. 

Making Pleats by hand looks beautiful- How to make the pleats?

PLEATS BY HAND
Plan a suitable size and spacing of pleats and work out how much fullness this requires. For example, for triple pleats taking 25cm(10 in) of fabric, spaced 15cm(6 in) apart, the fullness is just under 3 times the width of the pleated curtain (because you need 40 cm/16 in to cover 15 cm/6 in of track). To find out how many widths of fabric you will need for each curtain, multiply the distance the curtain is to cover by the fullness allowance, and divide by the width of fabric, rounding the figure up or down to the nearest half. Multiply by two (or the number of curtains) to give the total number of widths of fabric required.
Decide on the finished length and add an allowance of 10cmand at the hem and allows matching if necessary, multi-length by the total number of the amount of fabric. Work out the total width(un-pleated) curtain by multiplier of widths required by the fabric, subtracting 4cm(down each side edge of the curt total number of pleats, take (pleated) width of the curtain a space allowance at each side (2 in). Then divide by the plea tween the pleats. Round up c nearest whole number and add CURTAINS PLEATS BY HAND Plan a suitable size and spacing of pleats and work out how much fullness this requires.
For example, for triple pleats taking 25 cm (10 in) of fabric, spaced 15cm(6 in) apart, the fullness is just under 3 times the width of the pleated curtain (because you need 40 cm/16 in to cover 15 cm/6 in of track). To find out how many widths of fabric you will need for each curtain, multiply the distance the curtain is to cover by the fullness allowance, and divide by the width of fabric, rounding the figure up or down to the nearest half. Multiply by two (or the number of curtains) to give the total number of widths of fabric required. 
Decide on the finished length of the curtains and add an allowance of 10 elms (4 in) at the top and at the hem and an allowance for pattern matching if necessary. Multiply the finished length by the total number of widths to give the amount of fabric.
Work out the total width of the made-up (un-pleated) curtain by multiplying the number of widths required by the width of the fabric, subtracting 4 CMS for turnings down each side edge of the curtain. To find the total number of pleats, take the finished (pleated) width of the curtain and subtract the space allowance at each side edge, say 5 cm (2 in). Then divide by the planned space between the pleats. Round up or down to the nearest whole number and add one. (Calculate 1 the adjusted distance between the pleats if you have rounded the figure.)
Finally, check that the planned size of the pleats takes up all the fullness of the fabric. Make minor adjustments to the seam allowance and space at each side of the curtain to make measuring and marking up easier. For lining, you will need enough fabric to make up a panel the width of the finished curtain, as calculated above. No extra side turning allowance is required. For the length, add 12mm U in) top turning and 6 CMS hem allowance. Interlining should be the same size as the finished curtain. Make up a curtain panel, matching pattern, and a lining panel, using Rat seams and clipping into the selvages. Makeup interlining, using lapped seams (  199). Cut a strip of interfacing (woven or iron-on) 10 cm (4 in) deep (or more, according to the depth of heading) to match the width of the finished curtain.

Mark the turning allowance at the top of the curtain. Apply interfacing across the top turning, aligning the top of the interfacing with the top fold line of the curtain, position interlining on the wrong side of the fabric, leaving turning allowances all around. Lock- stitch in place, then press the turnings at the top and sides of the curtain over the interlining and herringbone stitch in place. Turn up and stitch a 4 cm double hem across the lower edge of the lining. Turn under and press 2 in) seams all round. Lockstitch lining to interlining, then slip stitch the folded edges of the lining to the folded edges of the curtain across the top and down the sides. Turn up the hem of the curtain and slipstitch in place beneath lining. 

Soft Furnishing -Making your own cushions – interior designing and tips – home makeover

 SOFT FURNISHINGS

Designing your own cushions

Cushions can be made from scratch, which gives complete freedom of choice in the matter of shape and filling. This will be necessary when cushions are to fit a window seat or follow the shape of a chair seat, but for scatter cushions you can choose from a wide range of ready-made shapes and sizes. Sometimes scatter cushions do need to be custom- made to match the size of a fragment of antique textile, or when making cushions with a theme – children love cat or flower-shaped cushions. The inner covers of cushions arc made of calico, sateen or down-proof cambric, according to the filling that is to go inside.

Feathers have always been the elite filling for cushions and their supreme softness and natural resilience is unchallenged, but feathers can work their way out through some weaves. Fibrous kapok can become lumpy and foam chip fillings are unavoidably so. Lightweight polyester cushion pads have the advantage of being washable, but they do not possess the supple quality of feathers. For thin squab cushions and deeper box or welted ones, choose a foam filling but check that it matches flammability safeguards.

Most furnishing fabrics and even some dress fabrics are suitable for covering scatter cushions, but for chairs or window scats use firm woven cottons or linens, or even fabrics of upholstery weight if they are not too thick. For sheer extravagance, delicate lace or hand-painted cushions are the ultimate accessory.

 SOFT FURNISHINGS MAKING CUSHIONS

Any cushion starts with a cushion pad. To calculate the amount of fabric and work out the pattern for a cushion, measure the pad and plan the main panels of fabric allowing 12 mm seams all round. For shaped cushions, either welted or plain, cut a paper template to fit the area exactly. If the cushion is an unusual shape – for a chair seat or a heart shape, for example – fold the paper in half before cutting it out to ensure it is symmetrical.

COVERING A BLOCK OF FOAM Using calico, cut a top panel and base panel to fit the foam block, allowing 12 mm all round for seams. Cut a strip of fabric for the welt on the straight grain, to fit all around the foam (see below).Join the ends to form a circle and fit it tightly around the foam. Clip into the seam allowances at corners and position the top and base panels in place. Tack together at the seams, leaving an opening in one edge. Remove the pad, stitch seams and press, then turn right side out. Insert the foam pad and slip stitch the opening by hand.

ENVELOPE METHOD This is a quick method suitable for calico covers or simple fabric covers with no piping. Start by measuring around the block of foam, to give the total amount of fabric required to wrap around the block. Add 3 cm seam allowance. Measure the length of the foam block and half-way down the welt at each end. Add 3 cm to give the total width of fabric required. Cut out a single piece of fabric to this measurement. 1 Join the top and bottom edge with a flat seam, leaving a 30cmopening in the center, or setting a zip into the seam if required.

This forms a tube. 2 Slip the tube over the foam pad, wrong side out, and pin a seam at each end. The seam line should be positioned in the center of each end panel, and be slightly shorter than the panel, allowing half the depth of the end panel at each end to make a neat miter. Remove the cover from the foam, tack and stitch the seam, then make short diagonal seams to form a neatly mitered end. Trim away the excess fabric from the seams, turn right side out and press. Replace the foam pad in the cover and stitch up the opening, or close with the zip.

SCATTER CUSHION Cut out the top cushion piece from fabric, allowing 12mm scam allowance all round, and make a paper template from it. Cut the paper across where the zip is to be inserted (about a third of the way down), and spread the pieces 2.5cm apart to allow for the zip. Make a template of this shape and use it to cut the fabric piece for the back. Insert the zip. Apply any decorative trims to the front panel of the cushion. Position the piping or a frill around one cushion piece if required, raw edges together, the piping or frill facing the center of the cushion piece. Tack and stitch in place. 

SOFT FURNISHINGS UPHOLSTERY – Home interior makeover with furnishings and cushions – Tips and guidance

SOFT FURNISHINGS UPHOLSTERY

The elegant curves of a regency cushion or a strong outline of a high-backed dining chair demand tight covering to emphasize their shape. Take in techniques, such as deep buttoning. The whole spectrum of fabric types can be used for upholstery from the heaviest velvet and tweeds and the intermediate weight linens and cottons to more and satin. As fitted upholstery is less easy to clean than removable covers (slipcovers), pastel weaves and prints on a light background will benefit from a stain-resistant finish and fitted arm caps will protect fabric from heavy wear.

Thick, patterned tapestry in rich colors is a practical and decorative alternative. Basic principles In its most basic form, upholstery is a panel of fabric fitted over any tight, calico-covered, padded surface. More advanced upholstery skills take in the fitting and shaping of the padding as well as the application of the top cover. Various combinations of stuffing and padding are used.

The most basic is the padded seat in which a thick layer of foam is cut to fit a seat panel and then held in place and slightly shaped by a tight calico cover, tacked under the edge of the seat panel. Formal chair seats are constructed on a base of webbing stretched across the frame of the seat and covered with a layer of coarse canvas to support traditional padding, usually horsehair and cotton wadding, or modern foam and polyester substitutes.

Upholstery may also contain springs in the seats and arms of chairs and sofas and occasionally in the seats of traditional upright dining or occasional chairs. A drop-in dining chair seat is a good initiation into the skills of upholstery because the work is limited to a small surface. Dining or occasional chairs with fully upholstered backs are a more advanced task. A tight calico cover is seamed or cut and shaped to fit around the back, allowing ease at the seat, before it is tacked in place. 

Decorative trimmings covering fabrics are nailed to the framework of upholstered furniture leaving at least the lower edge visible. Brass-headed furniture tacks can be used as a decorative disguise, following early traditions where nails were used in a variety of complex patterns. Braid or gimp can also be stapled or glued over tack heads, or adopt the more flamboyant historic practice of using fringing around chair edges or footstools and tassels on arm ends and bolsters.
UPHOLSTERY TOOLS

You will need some special tools if you plan to tackle the construction, as well as the finish, of upholstery. Webbing can be stretched more efficiently if you use a webbing stretcher which grips the webbing so you can pull it taut over the frame (or improvise with a block of wood. Use upholstery tacks and a fine hammer to fix the webbing, canvas and calico in place. The horsehair is held in place with large, loose stitches (bridle ties); you will need a heavy, straight or curved upholstery needle to do this. A finer curved needle is useful for slip stitching fabric in place – both the calico cover and the top cover of the chair. 

Sophisticated window dressing in interior designing and decoration

Although they have the appearance of a single fluid drape, the elements are cut separately and assembled at the window on a pelmet (valance) shelf. The swag can be cut on the bias, which gives it a naturally graceful swathe. The amount of fabric required varies enormously between a simple swag and one that hangs in deep voluptuous folds. Companion to the swag are the tails that fall to each side of the window and sometimes at intermediate points when there is more swag.
There is a wealth of tail designs from which to choose: spirals and flutes, asymmetrical tails that fold in from each side, or the more familiar form cut as a modified triangle and folded into a series of staggered pleats that reveal the lining, often in a contrast color and pattern.
SOPHISTICATED
The considerable area of wall above this sash window gives scope for a draped heading that extends well beyond the window frame in upswept swag. Tails overlay pleated curtains that tie back to flank the window seat. A plain white roller blind allows the careful lines of the curtain pleats to remain undisturbed.
ABOVE The molded plaster cornice around this bay has been employed as a decorative pelmet (valance) with swags and tails fixed behind it. Full length curtains hang between each window and end in a hemline cascade.
RIGHT The stunning rhetoric of double curtains takes Jull account of the shape and scale of these tall French windows which are flanked by lower windows on either side. The different heights are strongly maintained by the individual curtain poles from which hang outer curtains of dramatically somber shot silk in laurel and brown.
WINDOW DRESSING HAND SEWING CURTAINS For pleated or draped curtains tailored precisely to your windows, with the pleats or drapes positioned to suit their size and shape, hand-made curtain headings are essential. Particularly’ interesting erlects can be achieved with vertically patterned fabric if you plan the size and spacing of pleats to match pattern repeats across the curtain.
Triple pleats are appropriate when curtains are hung with rings from an exposed wooden or brass pole. By positioning a hook in the back of each pleat, the curtains hang so that the rings match the pleats. Lining and interlining are essential; linings may be made from plain chintz, rather than standard lining fabrics, which will create a flash of color where the tails hang in folds. Extravagant, draped effects require careful sewing.
 The detailed measurements depend on the size of the window and the type of fabric you are using as well as the finished effect you aim to achieve. It may be necessary to experiment so that you can be sure the measurements you plan to use will suit the window and create the effect you want. It is easier and more economical to make pairs of curtains from an exact number of widths of fabric. It also reduces the amount of sewing and pattern matching. Each curtain will require anything from 1 to 3 widths of fabric, unless the windows are unusually small or wide.

 Before you buy the fabric, do all your sums: you have to work out roughly how much fullness you need, decide on the number of widths of fabric, and then multiply that number by the total length required for each drop of fabric (including hem and turning allowances, and pattern matching). Then work out the precise spacing allowance (and the space between the end pleats and the edge of the curtain) before making up the curtain.